Ready to find out how EQS can make your regulatory workflows 10x more efficient? Schedule a zero-pressure demo to see how we can support your organization operationalize compliance, data privacy, sustainability management and investor relations.
Meet with an expert who will listen to your specific business needs
See our solutions in action, customized for you
We are here for you
Want to know more about our suite of solutions? Wondering if they are right for your specific business needs? Have feedback? Our global sales team is ready to answer all your questions and clear away those niggling doubts.
Want to know more about our suite of solutions? Wondering if they are right for your specific business needs? Have feedback? Our global sales team is ready to answer all your questions and clear away those niggling doubts.
Ready to find out how EQS can make your workflows 10x more efficient? Schedule a zero-pressure demo to see how we can support your organization operationalize sustainability management.
Meet with an expert who will listen to your specific business needs
This guide is written specifically for Convercent upgrade customers. Throughout this page you will find a link to the home page of the EQS knowledge base. There, within the knowledge base, we have created a very similar version of this guide for all customers – including you – that has more specific, clickable links embedded throughout the document.
How do I ensure continuity and make sure my Integrity Line is live right away?
We have replicated your configurations from Convercent to the EQS Compliance Cockpit! Your top priority actions are listed below – your job is to activate your account, review the configurations, and start to get comfortable with the new interface.
To help you learn your new system in relation to Convercent, we have provided a migration configuration guide that includes a glossary of terms and a summary of the configurations that we have migrated
What if I want to take this opportunity to update or change my helpline configurations?
Visit our Learn More Guide which will walk you through the migrated Integrity Line features with guidance on how to make updates. If you’re still interested in enhancing your new tool, visit our New Features Guide for even more information on new features not previously available to Convercent customers.
Before upgrade
Change management in your organization
We know that upgrading to a new helpline provider requires planning and coordination at your organization. To help ease the transition, we’ve assembled guidance and created templates that you can use.
Moving your program from helpline to Integrity Line
To help you learn how to do certain tasks that you used to do in Convercent, we have created a Glossary of Terms along with information about how those items were migrated (if applicable). This chart will also help you to learn Compliance Cockpit terminology.
Plan for notifying reporters about the platform change. If your migration does not include case data, then you may want to submit proxy reports into Integrity Line for any open cases. In that scenario, you will need to send a message to the reporter in Convercent that includes the following information: New Integrity Line landing page URL, case ID for the proxy case, and a one-time password.
If your migration does include case data, then the migration tooling will automatically post a message to reporters for open cases in Convercent. This message includes the new Integrity Line landing page URL, case ID for the proxy case, and a one-time password.
EQS Integrity Line Sandbox Access
Prior to Going Live on your new Integrity Line, we will first grant you access to a sandbox environment for a period of two weeks.
What should I do while I have sandbox access?
Sign-in to your user account in Compliance Cockpit and download your recovery key
CRITICAL: DO NOT SKIP THIS STEP
Losing access to your account without a recovery method in place will result in permanent data loss. The system does not allow EQS Support to trigger a password reset, making it impossible for our team to recover a locked account
a. Once signed into Compliance Cockpit, you will a see the popup to download your Recovery Key.
b. Follow the prompts to download your Recovery Key, select the checkbox of acknowledgement, and select Confirm Download.
c. Save your Recovery Key somewhere safe, and ensure continued access to your Integrity Line solution.
Please Note: Every Admin who logs in will need to complete this action.
2. Review the migrated configuration to include: landing page set-up, intake flow, case management set-up.
We recommend that you follow the process of submitting a test case from your new webintake to ensure the set-up is at parity with your Convercent set-up.
See Section 1.3 below for how to locate your WebIntake/landing page url
Please note that not all information could be transferred due to restrictions of the EQS system and migration tooling. For example, we are unable to migrate landing page videos, so you will not see videos on your migrated EQS webintake.
Reference a Convercent case record and locate the corresponding Integrity Line migrated case record. Click through the different screens to ensure that you can locate data from the Convercent case in the migrated Integrity Line case. For guidance on where migrated data points are located in Integrity Line, reference the Glossary of Terms.
Manual Case Access: By default, users with the Admin or Case Admin role can see all cases, including legacy cases. Active users with the Case Moderator role can be granted access to a case to assist with review using the User Access settings on each case (click on the […] context menu, then choose User Access from the drop-down).
Automatic Case Access: If you were using Notification Profiles in Convercent, you will see corresponding Roles in Compliance Cockpit. By default, those roles are configured to only grant access to new cases. In order to grant automatic access to legacy cases, you can edit the Role to include access to the folders that contain migrated cases.
If you discover that a field configuration is missing in your migrated Sandbox, please either attend office hours or submit a ticket via EQS Support Center.
To submit a question, click on “Contact Support” in the upper lefthand corner. When the form populates, select the category “Compliance & Ethics Solutions” and the EQS Product “Convercent/OneTrust Upgrade Questions.” Please provide your question in the description.
3. Take this time to familiarize yourself with the system and train your users. To ensure success, please read the Going Live and Learn Moresections of this guide.
4. Note that ANY configuration changes made in Sandbox will NOT be moved to Production. Make note of any changes you may want to make so that you can apply them once the Production environment is live.
1. Going Live
These are the required steps for accessing your account and making sure everything is live.
1.1. Sign in to your user account in Compliance Cockpit
Upon go-live, ALL your users from the Convercent User Manager migrated to the Data Center.
01. You will receive an email to activate your account and create a password. You must take action within 72 hours or else the link will expire.
Please Note
For most customers, the username associated with your Convercent account matches the email associated with that same account. If your username in Convercent did not match your company email; note you will still sign into Compliance Cockpit with your email not your previous username. If you are having trouble signing in, please contact support or your EQS consultant for help.
02. Download your Recovery Key
Note: You will need to complete this step even if though you completed this for the Sandbox environment. The Production environment is separate and will generate a brand new Recovery Key!Ensure you save the new key for your Production environment.
CRITICAL: DO NOT SKIP THIS STEP
Losing access to your account without a recovery method in place will result in permanent data loss. The system does not allow EQS Support to trigger a password reset, making it impossible for our team to recover a locked account.
You need to complete this step even if though you completed this for the sandbox environment. The production environment is completely separate from the sandbox and will generate a brand new Recovery Key!Ensure you save the new key for your Production environment and store in a safe place moving forward.
a. Once signed into Compliance Cockpit, you will a see the popup to download your Recovery Key.
b. Follow the prompts to download your Recovery Key, select the checkbox of acknowledgement, and select Confirm Download.
c. Save your Recovery Key somewhere safe, and ensure continued access to your Integrity Line solution.
Please Note: Every Admin who logs in will need to complete this action.
Now that you have saved your Recovery Key, you have fully activated your account! Don’t forget to bookmarkhttps://compliance.eqscockpit.com/ for easy access to the Compliance Cockpit.
Enable Notifications for Integrity Line
a. Once signed into Compliance cockpit, navigate to your profile settings by clicking on your username in the upper right-hand corner.
b. Click on Notification settings and open the dropdown for Integrity Line.
c. Toggle on the desired options for your user profile in order to receive email notifications of the specific activities.
Note – This setting is per user, so each admin user will need to update their notification settings accordingly.
Password Recovery
This application does not support password recovery methods such as security questions or Support-assisted password resets. Instead, there are only two ways to recover access:
01. Recovery Key File – During account activation, you must download and print a Recovery Key. This is the only way to reset your password if you lose access. Store it in a secure location.
02. Another Active Admin User – If there is a second Compliance COCKPIT user with access to the Data Center in your system, they can assist you in resetting your password. When you request a password reset, the second user will get an email, and they can click through to approve the password reset.
1.2. Register for the Knowledge Base and Support Resources
This is a separate log-in from your Compliance Cockpit username and password.
03. Support Queries are submitted through the Support Center as well.
On the homepage, click on the Contact Support Tab
On the support form choose the following options:
Category – Ethics & Compliance Solutions
Product – Convercent/OneTrust Upgrade Questions
Fill out rest of the form and Send.
04. Bookmark the URL so that you can easily access the knowledge base and reach out to Support when needed!
1.3 Locate your Webintake (Landing Page) URL
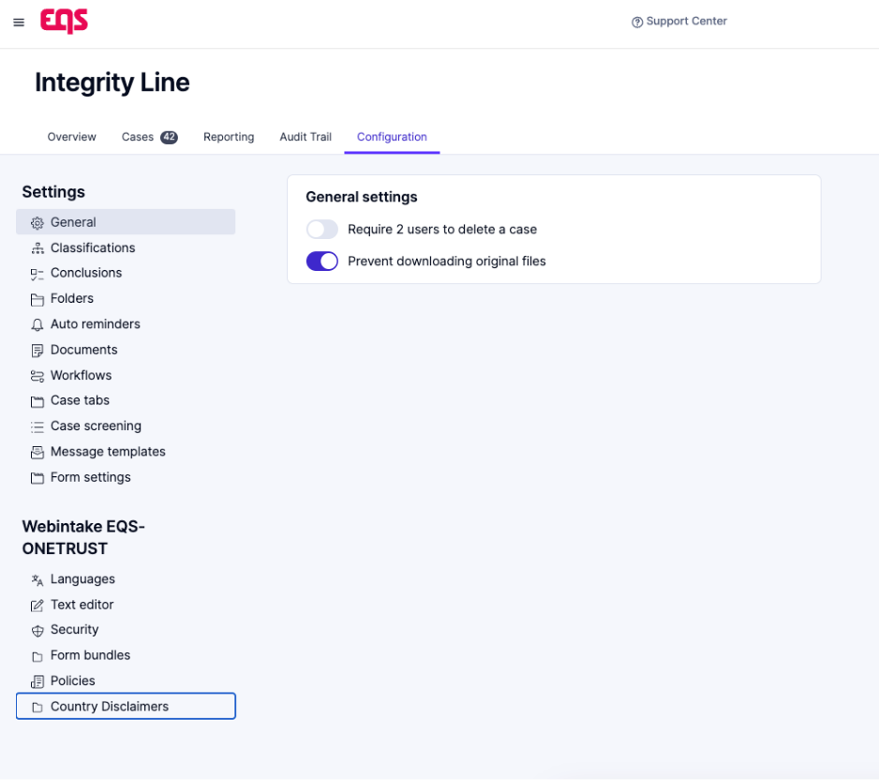
01. Within Compliance Cockpit, open Integrity Line from the top left navigation menu.
02. Click on the Configuration tab.
03. On the left side, under the Webintake section, click on Text editor.
04. This page shows your landing page URL! In Integrity Line, this is called a Webintake. The format is companyname.integrityline.com.
05. Ensure you get IT resources involved early and complete step 1.6 below if you utilize any vanity URL’s or 301 redirects.
1.4. Review your Webintake (Landing Page) and Intake Form
01. Once you have found your Webintake URL; click on that link to read each section and click through the boxes to explore the page.
If needed, you can make text edits by entering edit mode. Once you’re within the text editor, right click on text to edit your web intake main page and subsequent page.
Click here to watch a video on finding your Webintake URL and making updates to your landing page.
02. Visit the Learn More guide or the Knowledge Base for more information on updating translations via text editor as well.
Note
Text can be edited within the rich text editor, but if you would like to make changes the branding of your Webintake, please contact support or your EQS consultant.
03. Click on Make a Report to view the intake form.
Note
The options under the “Where did this incident occur?” question on the first page of your intake form mirror the available Country selections configured in Convercent or otherwise indicated by your team on the configuration form. If you do not see this question, then it means that your Convercent intake did not require a country selection. We have mirrored the Convercent reporter experience in your new instance by only associating the intake form to one Country.
Also Note
If you used Geography Rules in Convercent, we have recreated that configuration by creating a Standard Form for each country/region as needed. They will be clearly labeled.
04. The existing country options (or lack thereof) can be updated within the form settings. See the Learn More guide or the Knowledge Base for more information on how to update.
05. The subsequent form questions can be updated via the form editor. See the Learn More guide or the Knowledge Base for more information on how to update.
Note
If you used Guided Intake in Convercent, any survey questions related to a standard issue type have not been recreated. Any questions and translations must be manually added via the form editor if you wish to include them. For any Custom issue types with questions and/or translations, those have been recreated and should be reflected in the form.
06. If any updates have been made, go back to your Webintake landing page, and refresh the page to verify that the intake channel is now functioning as expected.
1.5. Access Case Management
01. Within Compliance Cockpit, open Integrity Line from the top left navigation menu.
02. On the Cases tab you will find a table that you can filter and sort to manage your cases. Compliance Managers will only see the cases that they have access to, as determined by their user role. Note: Because your Sandbox and Production accounts are entirely separate, any updates that you may have made to Case Access in Sandbox will not carry over automatically.
Manual Case Access: By default, users with the Admin or Case Admin role can see all cases, including legacy cases. Active users with the Case Moderator role can be granted access to individual cases as needed via the User Access settings on each case (click on the […] context menu, then choose User Access from the drop-down).
Automatic Case Access: If you were using Notification Profiles in Convercent, you will see corresponding Roles in Compliance Cockpit. By default, those roles are configured to only grant access to new cases. In order to grant automatic access to legacy cases, you can edit the Role to include access to the folders that contain migrated cases.
03. To review how your Case Management configuration in Convercent has been replicated, see the Glossary of Terms migration configuration guide for more detail.
04. Visit the Knowledge Base to find a full manual on case management.
1.6. Submit internal requests for IT and other internal updates
01. Vanity URL Redirect
Note
To support the transition, EQS will put in place a temporary redirect so that any reporter who tries to submit a case via Convercent will automatically be redirected to your new Integrity Line. Reporters will still be able to access the Convercent “Check Status” page, which is where they will see a message with their new case credentials on Integrity Line.
If your company uses a vanity URL for your helpline, such as www.companyname.com/ethicsline, submit a request to your IT team to have the vanity URL updated to redirect users to your new Integrity Line Webintake (landing page) URL identified in Step #1.3.
If you are not using a vanity URL redirect, make sure to update your Helpline URL in publicity materials. The Convercent URL format is https://app.convercent.com/en-US/LandingPage/7353d7bb-d168-ec11-a989-000d3ab9f011.
02. Single Sign-On (SSO)
Note
If multifactor authentication was requested for your Integrity Line configuration, SSO cannot be enabled. You can skip this step in the guide.
If your Convercent account uses single sign-on, you can enable it in Compliance Cockpit as well. To do so, follow these steps:
Create a user account for IT.
IT: Log into EQS Compliance Cockpit.
IT: Click the gear icon in the top right to open the settings sidebar.
IT: Click on SSO Configuration.
IT: Download the SSO manual as needed and provide to your internal IT user to configure SSO.
1.7. You’re Live
Continuing reading below to learn more
2. Learn More
Once you have completed the steps in the Getting Started Guide above, you can be confident that you will not experience down time. If you’re still interested in learning more, see the below information to guide you through any configuration updates that you may want to make to your new Integrity Line.
The below walks through the left side navigation bar within Integrity Line’s configuration tools. We specifically focus on how the features correspond to Convercent features. For features available in Integrity Line not outlined below, they are new to Convercent customers!! Once you have mastered your migrated functionality, see our new functionality guide for even more detail on improving your Integrity Line.
Note
If there are features outlined in either guide that you do not see in your Integrity Line configuration menu, those features may not be included within your subscription tier. Please contact your Customer Success Manager or support for additional information.
2.1 Integrity Line – Settings
For more information about all of the items in Settings, visit the Knowledge Base.
01. General
02. Auto-Reply: This toggle enables an automatic response to the reporter after a case is submitted. If you had an automated response message configured in Convercent, this has been enabled for you and the automated message has been configured to mirror your Convercent message.
03. Classifications
Classifications correspond to Issue Types in Convercent. We have recreated your Convercent issue types as Classifications in your Integrity Line configuration.
You can click “Create” to add a classification. You can also modify or remove classifications by using the pencil or trashcan icons on the far right.
04. Conclusions
Conclusions correspond to Resolution Type in Convercent.
You can click “Create” to add a conclusion. You can also modify or remove conclusions by using the pencil or trashcan icons on the far right.
05. Folders
Folders are only configured in your account if they are required to replicate your configurations from Convercent.
If you route reports in Convercent based on issue type, country, location, department, or Business unit folders are not needed. Custom user roles can be created to allow certain roles to only access cases with the above attributes. However, if you routed cases based on a custom data point in Convercent, then folders, a folder routing question, and custom roles were created to replicate this.
If folders are not currently being used, you can create folders to group cases and apply more granular permissions as needed.
06. Workflows
If your team utilized custom status’ in Convercent, these were recreated as Steps within a workflow.
07. Visit the New Features guide to learn more about a more in depth use case for Workflows.
08. Case Tabs
Severity and Tags have been recreated as custom questions in the Integrity Line. In addition, any custom case manager fields configured in Convercent have been recreated here.
You can easily edit the custom tabs already created, add additional tabs, reorder custom tabs within this configuration section.
Please note that if you used issue required field in Convercent, most of those were recreated by making fields within custom case tabs required. Not all fields in Integrity Line can be “required” the same way they were in Convercent but see the New Features Guide linked above for more detail on how to utilize case tabs and workflows to ensure all cases follow the same process.
09. Case Screening
10. Escalation rules from Convercent were migrated to this case screening section. Here you can create additional rules to route sensitive cases or limit access to cases based on key words.
11. Message Templates
Message Templates correspond to Message Board Templates in Convercent.
The auto-response that a reporter receives after submitting a case is configured in general settings in Integrity Line (see 01 in this section).
If you had Message Board templates configurated in Convercent these have been replicated for you here. Note – Message Templates have been migrated as plain text and may need to be adjusted or reformatted.
12. Form Settings
Form Settings allow you to make some changes to the contact information fields that are requested for the reporter. This could previously be modified via each intake channel in Convercent but is managed at a global level for all forms in Integrity Line. This updated to reflect the most common use case in Convercent.
2.2. Integrity Line – Web Intake
As you get started with Integrity Line, you may see more than one Webintake section, each will be clearly labeled. For example, if your Integrity Line program accepts reports via call center, then you may see a separate Webintake dedicated to call center so that the reporting method can be identified. Check with your Integrity Line admin if you have questions about the purpose of additional Webintakes.
Note
Each of the settings below are specific for each Web Intake within your EQS Integrity Line. As you make configuration changes, make sure you are working within the appropriate Webintake and, when necessary, you make changes to BOTH webintakes.
For more information about all of the items related to Web Intake, visit the Knowledge Base.
01. Web Intake Languages
As a Convercent upgrade customer, you may see Web Intake languages and translations. Learn more about managing and adding translations in the knowledge base.
Note
If you add additional languages, please review your Web Intake page, all forms, and country disclaimers carefully to ensure that the translated text shows the terminology that you expect and need.
02. Text Editor
This tab is where you can find your landing page URL; your landing page has been configured to match your Convercent Landing Page.
This tab is also where you can change text on your landing page. Click on Edit, and then right-click on any text sections that you want to edit. Right clicking will open a pop-up modal that includes a rich-text editor.
Each pop-up text editor will also allow you to modify translations by selecting the applicable language in the drop down and making subsequent updates.
Note
If you were using a custom footer on your Convercent landing page, those have been migrated in English only. If you want to change the text or add translations, you can do so using the Text Editor in Compliance Cockpit.
03. Form Bundles
Form Bundles are equivalent to Intake Channels in Convercent. Find your intake channel(s) within each form in the Published section.
Note
Each form bundle must be linked to a web intake tile on your landing page. For the upgrade, your consultant has created each form bundle to correspond to your Convercent helpline configuration. If you determine that you need an additional form bundle, you can create one in your account, but you will also need to contact Support for assistance with a new tile that can be linked to the second form bundle.
Also Note
If you had an intake channel(s) not linked to geography rules in Convercent, these have been migrated as forms within the Incident form bundle, but a few additional steps are needed to make these forms accessible for intake.
You can see this migrated form is not currently linked to any countries. Because external reporters are routed to the applicable form based on their country selection, reporters are currently never routed to this form or forms. If you would like external reporters to access these forms, you will either need to adjust the countries tied to each form so reporters are routed appropriately or reach out to support to learn how to link these additional forms as a separate tile on your migrated webintake.
If your internal users navigated to a specific intake channel via direct link in Convercent, that direct link no longer exists in EQS (each individual intake channel link from CVT will route to the new EQS webintake page). Please see the Knowledge Base to understand how to create an additional form bundle, duplicate this form to that new bundle, and make it accessible to internal users. Internal users could then select the appropriate form bundle when submitting an internal case.
Form Settings – Click on the gear icon to make changes to form settings.
Geography Rules in Convercent created a varied intake experience based on country/region. This same experience is recreated in Integrity Line by creating different Forms for different countries.
If you update countries here, the country disclaimers will also need to be updated. See the Country Disclaimer section below for more info.
Editing Form Questions – Click on the pencil icon to view the fields and questions that are present on each form.
You can edit the question text, drop down items, and translations all within this section!
To learn more about customizing a form, visit the Knowledge Base.
Note
If you used Guided Intake in Convercent, any survey questions related to a standard issue type have not been recreated. Any questions and translations must be manually added via the form editor if you wish to include them. For any Custom issue types with questions and/or translations, those have been recreated and should be reflected in the form.
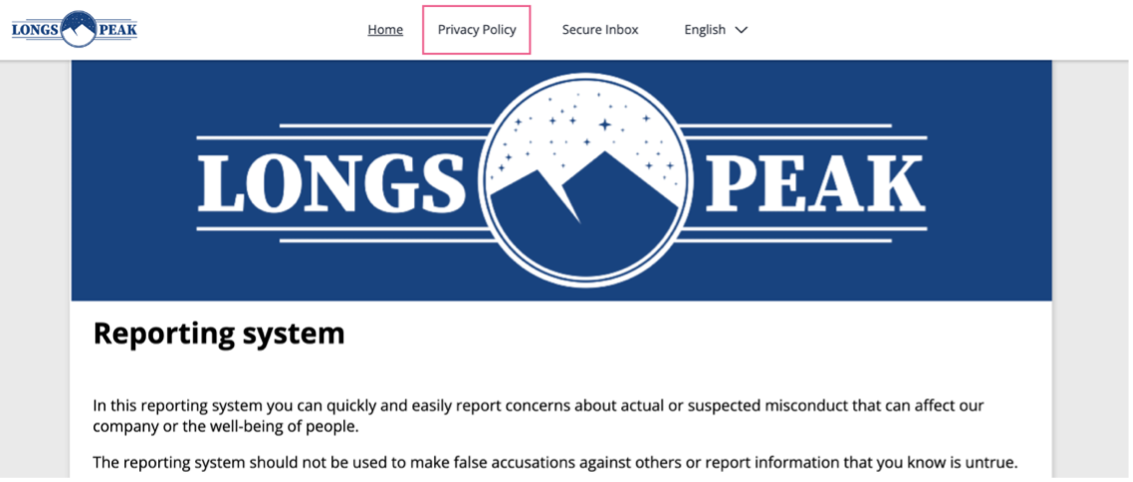
04. Policies
This is an optional feature for privacy policies. If you had a privacy policy in Convercent, we have added that for you here, and you will see a link in the header of your landing page. If you did not have a privacy policy configured in Convercent, then we have removed the link from your landing page, and you can ignore the template policy contained under this tab. If you would like to learn more, visit the Knowledge Base and reach out to Support to have the header link restored.
Note
You can also require attestation to policies upon intake (by configuring a policy attestation question). Policy attestation questions were not enabled for call center customers; we do not recommend this approach as it will require call center agents to read the entirety of the privacy policy before proceeding.
05. Country Disclaimers
These correspond to Terms & Conditions in Convercent. When a Country Disclaimer is configured, there will be a pop-up after that country is selected. When there is no disclaimer configured for a country, there will be no pop-up after selection. If you want to show terms and conditions for all countries, you must make sure that these are configured.
We’ve mirrored the terms and conditions text from Convercent. To make changes to this text, please learn more about country disclaimers in the Knowledge Base.
2.3. Data Center – User Management
Your users in Convercent were migrated to the Data Center. See below for information on how to create more users and how to review the Roles/Permissions that were migrated for you. For even more information about all of the items related to Data Center, visit the Knowledge Base and look for the Data Center.
Activate Other Admin Users
All users were migrated from your Convercent organization to the EQS Data Center. If you are the first admin to log in, you have access to trigger activation emails to any additional admin users.
In Data Center, you will see a Resend activation email button available on each user. Anyone who receives the activation email has 72 hours to activate their account. If the link expires, you will need to trigger the activation email for the user again.
Note – You can trigger the activation email for all pending users in your account at once by clicking the button at the top of the Users page.
01. Create Users: Within Data Center, from any tab, you can create users by clicking “Create” or “Import users” in the top right corner. Make sure to assign them the correct user role in the Active Roles field.
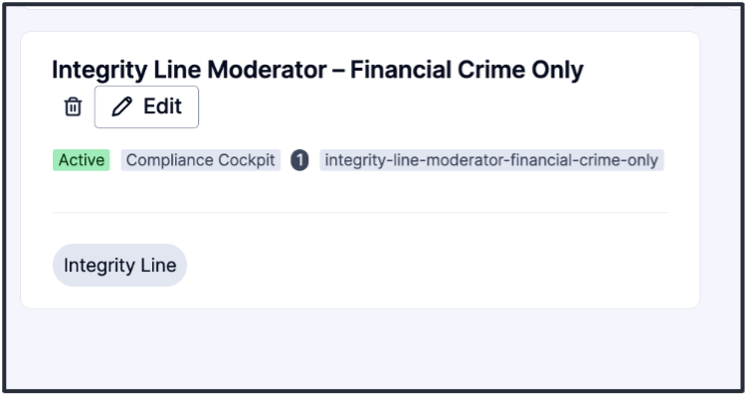
02. In Convercent, your case access permissions were determined by two settings – User Account Permissions and Notification Profiles. In EQS, case access is managed through comprehensive role assignments in the Roles & permissions tab.
a. Roles have been created here to match your permissions and notification profiles in Convercent.
b. This screenshot shows an example of a variation of the Moderator role that will only give users access to cases that have the Financial Crime classification. You can click into each role to see modules they have access to, the actions those users can complete, and the attribute-based permissions, if applicable.
06. You can modify a specific user role by navigating to the user’s profile and adding/removing the roles within the “Active Role” drop down.
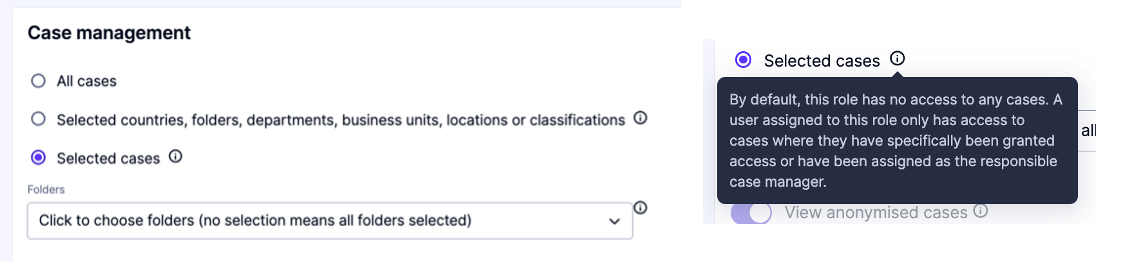
Visit the Knowledge Base for more information on using User Roles for routing cases and on updating and creating additional custom user roles.
07. Assigning a Moderator to a specific case: The Moderator role in Compliance Cockpit is limited to see “Selected cases” only. By default, a user with this permission has no access to any cases. Another admin, who has access to cases, can manually add them to a case they need to review.
a. Within a case, open the User access panel and scroll to the bottom to find the section that shows Users without access to this case due to their role. This is where you can grant access to users who have the Selected cases permission.
2.4. Data Center Attribute Management
For more information about all of the items related to Data Center, visit the Knowledge Base and look for the Data Center.
01. In Convercent you could manage your Location and Department within the organization management screen. In integrity Line you will manage your Location and Department attributes within the Data Center.
Once in the Data Center navigate to the Attributes Tab. Here you can view the locations and departments migrated from Convercent.
To Edit Locations or Departments click on the arrow to the far right to view the “Details” screen. Here you can click on each individual attribute to view, edit, and deactivate as needed.
Note
Here you will see a business unit attribute as well. This was not previously available in Convercent but is a standard attribute in Integrity Line that can be surfaced on intake and utilized within Roles and Permissions.
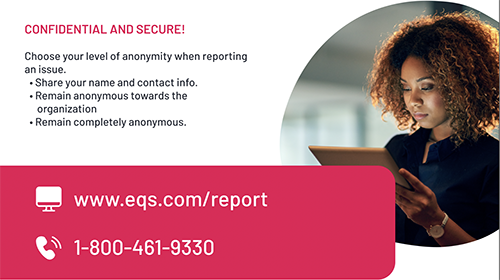
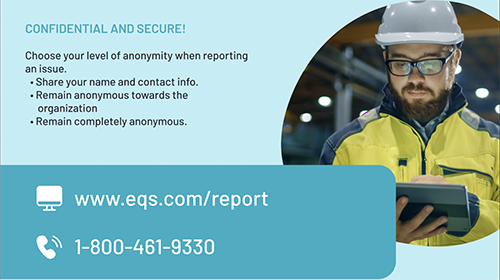
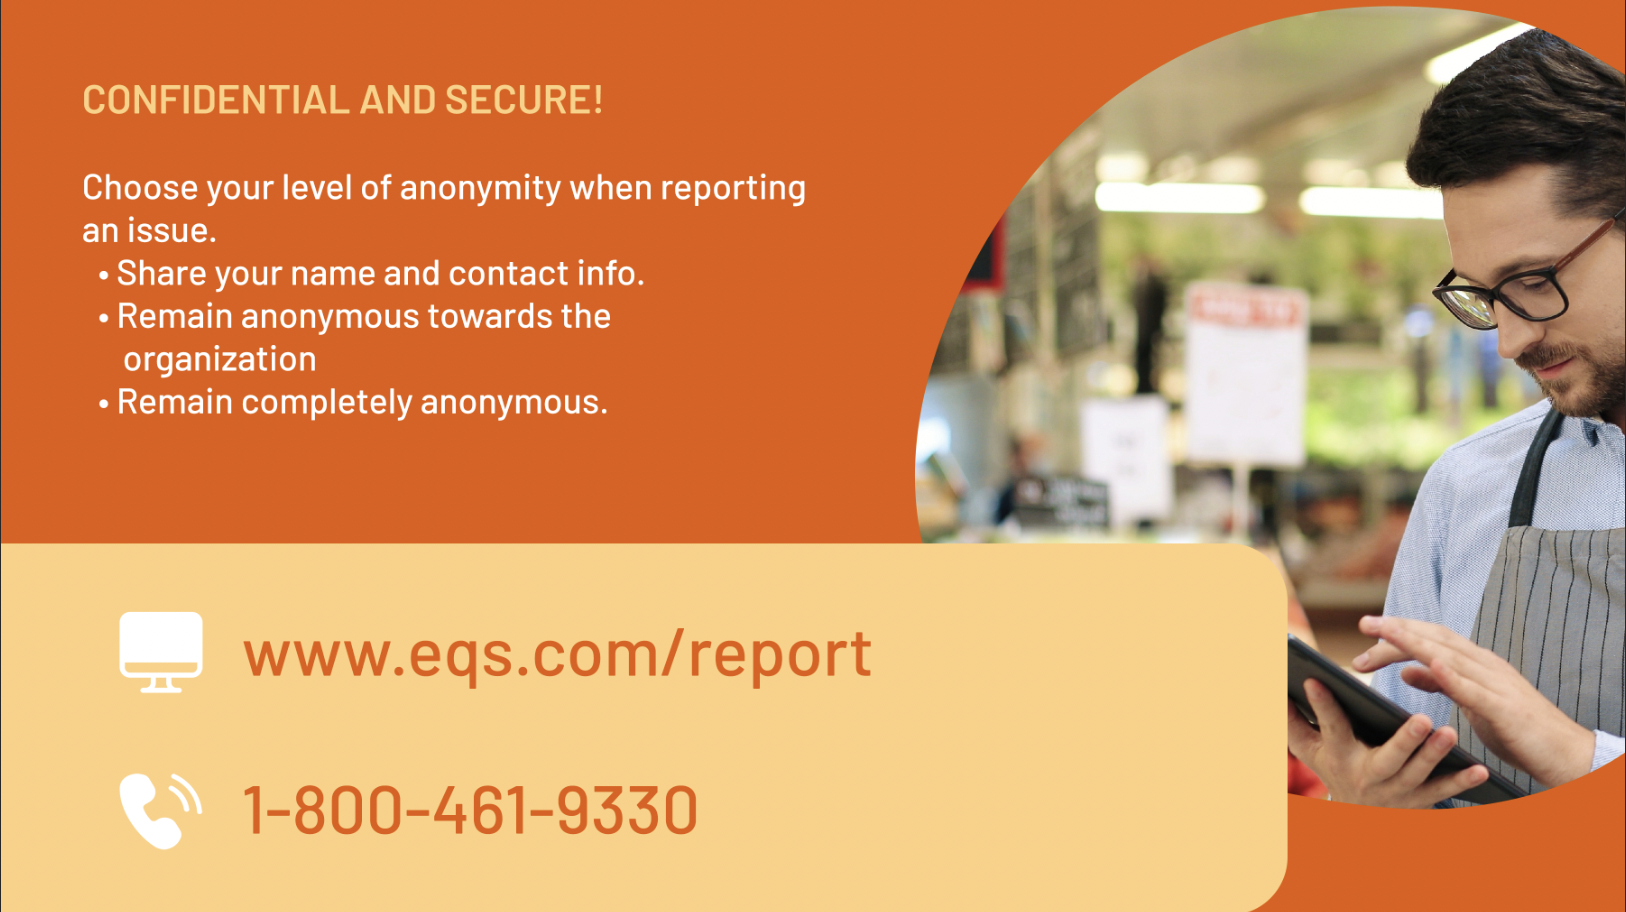
Our current offering of posters, email banners, and communication templates can be used to help you successfully deliver your communication strategy with your Integrity Line. These can be customized by your team, if needed.


 English